I've been delving into the world of painting - love it! But, I don't always love what I make...in the past few months I've done some of this...
Obviously - some very amateur, some better than others...but I'm learning, creating, and having fun - so that's the point. My latest piece...
Yes, those are antique water knobs actually screwed onto my canvas. I had this planned out for awhile. Now depending on my mood I either love it or hate it. Sometimes I look at it and think - "that is pretty cool!", and other times I think "what a weirdo!"...
I checked out some art books from the library and about half way through the first one decided I didn't need to read about techniques and how to mix colors and what art is or isn't. Art can be anything...as noted by this horrible french fry sculpture on the campus of my Alma mater...ugh...
It doesn't mean everyone will like it, in fact they won't. As long as I like what I'm doing and I'm expressing myself than I think it's okay - although I don't think giant french fries are ever okay. =)
I learn the most about art and technique from just studying paintings, not books!
Little Miss is getting very artsy with me. It's our mommy/daughter time while Mr Man has a nap...of course her best work always ends up on her arms and then rinsed away down the drain. She is quite the little creative girl! Some of the color mixing she does is awesome. I wish I could replicate it.
It's good down time for us - we can chat, no technology is involved, and get creative. It also has helped Little Miss with her fine motor skills - the brush painting anyways, not so much the body painting. =)
What do you do for a creative outlet?
Showing posts with label activities. Show all posts
Friday, November 18, 2011
Thursday, August 18, 2011
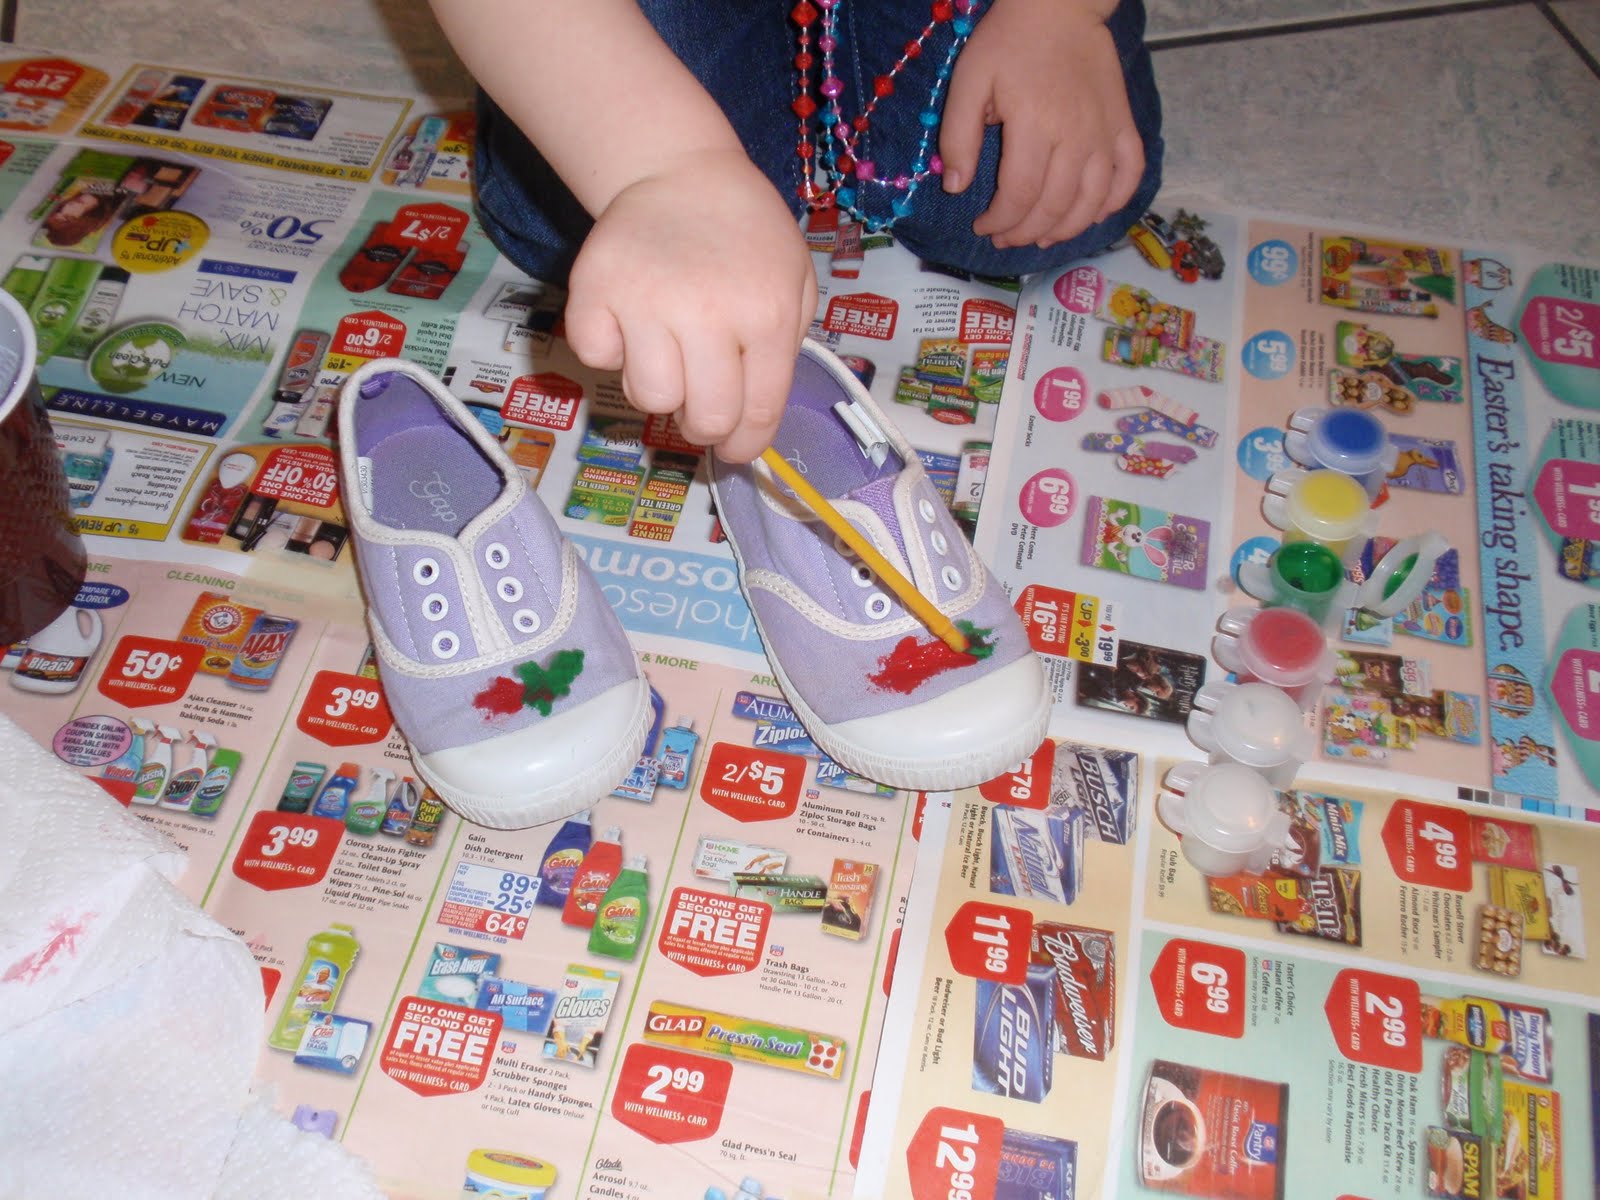
Painted Shoes
Here is a quick fun project for your little aspiring Van Gogh...
Little Miss is really into painting lately. So for her birthday we gave her a set of paints and some cute thrift store (canvas) shoes...
The finished product...
Really though it's never finished. Every couple of weeks she'll announce that she needs to work on her shoes again. Super fun and super cheap! Paint included - $4. My favorite kind of kid project.
Did I mention all the painting is giving her some great fine motor skill practice? She is way cute wearing them around town too! They match everything and people are always asking her about her shoes. I might need a pair...
Friday, August 5, 2011
Love is Spelled T-I-M-E
A wise man once said - "Love is spelled T-I-M-E, time." How true it is. And as a busy parent it is so important to find one-on-one time with your children. My new goal is to find one-on-one time on a weekly basis. Now that we live super far away from family I think this will mean having "mommy and me"/"daddy and me" dates at the same time.
I've been so busy and preoccupied with moving in, decorating, fixing up our new home - that I really need to refocus on being a mom first. So, I've decided I will do something super fun with Little Miss and Mr Man every Friday - just us. Something out of the ordinary and beyond our normal routine.
Remember forts? I grew up making tons of forts with my sisters out of queen size sheets. So fun.
Little Miss and I made this fort and watched a movie together in it. Sadly, forts are not as large and spacious as they once felt, good thing we like to cuddle!
What are you doing for fun with your children today?
{Something I have to tell myself every once in awhile to refocus: people matter, not my to-do list...}
Tuesday, April 12, 2011
DIY: Silk Tie Easter Eggs {archives}
I love these Easter Eggs...beautiful. And different. This isn't exactly a kid friendly project - at least not for my toddler - but it would be fun for slightly older kids to help.
You'll need 100% silk ties from the thrift store, an old pillowcase or lightweight light colored material (got mine at the thrift store too), some string or twist ties, and scissors.
These two were my favorite ties. Love the elephants.
First deconstruct the ties carefully, salvage just the silk material.
Then wrap your eggs as tight as possible without breaking the egg (right side of the material touching the surface of the eggs). Then wrap again with the pillowcase material.
Place gently in a pot, cover eggs with water and add 1/4 cup vinegar. Then turn the heat on. Once the water starts boiling, time them for 20 min. Check periodically for floaters - and push them back down again. Remove from water and let cool and dry till damp.I was impatient so I gave my eggs more airflow so they'd cool faster by placing my cooling rack over my sink and a paper towel underneath to catch drips.
Some of my favorites...
I love how the paisley ties turned out!

I got this idea from Our Best Bites. A few silk ties from the thrift store and voila!
Click here for full instructions and more pictures from Our Best Bites. Oh, and they're not edible! The dye on silk ties is not FDA approved, who knows where it's from - so don't try it! I'm going to find some cute white ceramic egg cups and display mine.
Thursday, March 17, 2011
Mint {Green} Oreo Cupcakes
This is the perfect St. Patrick's Day treat for the chocolate lover, the mint lover, the oreo lover....the lover of pretty food. My husband always teases me because I am slightly obsessed with food being appealing to the eye (I've watched food network one too many times). I love garnishing. Even just for the 2 of us. Anyway - this is also the perfect treat to make with kids!
Don't they look pretty? It get's better...
First start with some mint oreos - remove the tops and place cookie side down in a muffin tin lined with paper cups.
My new favorite cake mix is this butter recipe - it uses butter instead of oil and is so much better! Thick and creamy. Love it. One box of cake mix will yield about 28 cupcakes. Make according to box directions and cover up your naked oreos about 3/4 of the way full.
After baking - they'll look like this on the bottom.
...and this on the inside...
No cupcake is complete until frosted. First you'll need one cube butter and one 8 oz cream cheese - both room temperature. Beat together with a mixer until fluffy.
Next add 1 Tablespoon vanilla.
And about 1 lb powdered sugar - a cup at a time. About 4 cups. I think I added a little more to get the thicker consistency I wanted for piping on the frosting...
That's about thick enough...
And of course it has to be green for St Patrick's Day!
And done.
Make sure you have someone to help you lick the beaters - like a cute little girl still in her pajamas...whoever said cream cheese frosting wasn't good for breakfast?!
I used the largest cake decorating tip I had and piped on the frosting in swirling peaks.
But something was missing...oh yes. A dusting of fine oreo crumbs that I made out of the tops I took off originally. Placed in a food processor and voila. Beautiful and tasty!
Happy St Patricks Day!! Have fun with your kids!
Monday, March 14, 2011
Celebrating St Patrick's Day
So I love holidays. This probably explains why my daughter measures time by what holiday is coming next. Here’s a look into how we celebrate St. Patrick’s Day:
Step 1: Wear Green. Silly glasses are a must.
Step 2: Follow the leprechaun footprints to see what he left you! Last year, they led right into my daughter’s room, where she discovered a bucket filled with Shamrock coins and a tasty snack.
Step 3: Play Games. I had my daughter help me make these shamrocks that we used for two games. A memory/matching game…
…and our own version of a cake walk. We placed the shamrocks in a circle, and she walked around them till the music stopped, then shouted out which shape she stopped on.
Step 4: FINGER PAINT! We like to finger paint with yogurt…then you can delight in licking it off your fingers. Key lime pie would have been the best flavor to use, but all we had was vanilla—easy to fix with a little food coloring. (My daughter went through a phase where she didn’t like getting her hands dirty….hence the spoon. Oh well, makes it easier to eat!)
Step 5: Eat green food. Seriously—anything you can turn green, do it! We like to eat breakfast for dinner. And breakfast foods are easy to turn green. We had green French toast, eggs and milk. If I could have figured out a way to turn the sausage green, I would have ;)
How do you celebrate St. Patrick’s Day?
Marie is a stay at home mom of two adorable kiddos who keep her super busy! She has a dual degree in Elementary Education and Early Childhood Education and continues to use her degree everyday of her mommy career!
Marie is one of my good friends and someone I look up to very much as a mommy. She has tons of fun ideas for things to do with your kids - so keep an eye out for her future guest posts.
Step 1: Wear Green. Silly glasses are a must.
Step 2: Follow the leprechaun footprints to see what he left you! Last year, they led right into my daughter’s room, where she discovered a bucket filled with Shamrock coins and a tasty snack.
Step 3: Play Games. I had my daughter help me make these shamrocks that we used for two games. A memory/matching game…
…and our own version of a cake walk. We placed the shamrocks in a circle, and she walked around them till the music stopped, then shouted out which shape she stopped on.
Step 4: FINGER PAINT! We like to finger paint with yogurt…then you can delight in licking it off your fingers. Key lime pie would have been the best flavor to use, but all we had was vanilla—easy to fix with a little food coloring. (My daughter went through a phase where she didn’t like getting her hands dirty….hence the spoon. Oh well, makes it easier to eat!)
Step 5: Eat green food. Seriously—anything you can turn green, do it! We like to eat breakfast for dinner. And breakfast foods are easy to turn green. We had green French toast, eggs and milk. If I could have figured out a way to turn the sausage green, I would have ;)
How do you celebrate St. Patrick’s Day?
________________________________________________________________
Marie is a stay at home mom of two adorable kiddos who keep her super busy! She has a dual degree in Elementary Education and Early Childhood Education and continues to use her degree everyday of her mommy career!Marie is one of my good friends and someone I look up to very much as a mommy. She has tons of fun ideas for things to do with your kids - so keep an eye out for her future guest posts.
Labels:
activities,
guest blogger,
holidays,
preschool activities
Subscribe to:
Posts (Atom)