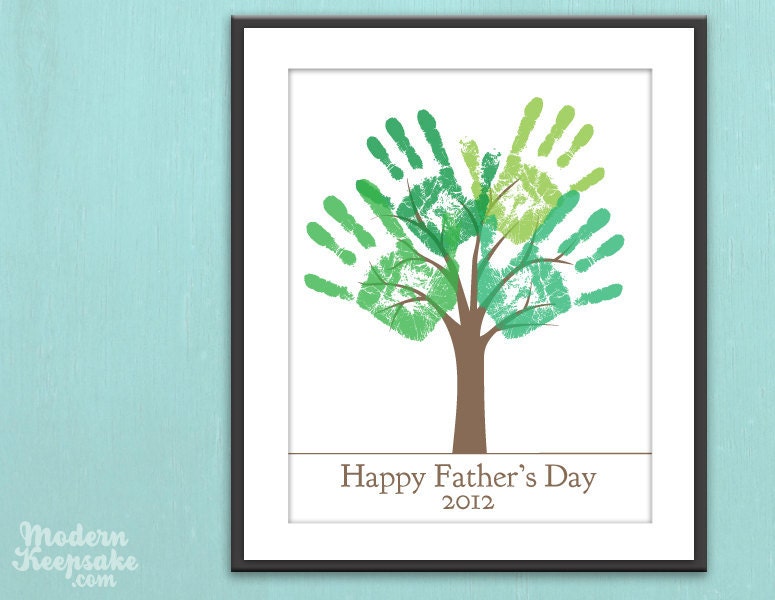
So many cute ideas and it's not too late to get started on any of them!!
Showing posts with label diy. Show all posts
Friday, June 15, 2012
Friday Finds for Father's Day
Labels:
crafts,
dad,
diy,
father's day,
friday finds,
gifts,
holidays,
just for fun
Tuesday, November 22, 2011
Videos
Lots of Video Tutorials to come!! I already have some in mind...meanwhile, check out what Little Miss has been memorizing...
Monday, August 1, 2011
DIY: Cake Plate Crazy
Yep - I went crazy. I got this idea from my friend over at Craft Doodle. Natalie is amazingly talented and creative! My next project of hers to try - the Madhatter Lamp - also seen here. Love it! You can get all the step-by-step how-to's on her site. These cake stands make great cheap gifts too. All my plates and candle sticks came from thrift stores - each stand was about $2 or so. Thanks Nat!
Tuesday, April 12, 2011
DIY: Silk Tie Easter Eggs {archives}
I love these Easter Eggs...beautiful. And different. This isn't exactly a kid friendly project - at least not for my toddler - but it would be fun for slightly older kids to help.
You'll need 100% silk ties from the thrift store, an old pillowcase or lightweight light colored material (got mine at the thrift store too), some string or twist ties, and scissors.
These two were my favorite ties. Love the elephants.
First deconstruct the ties carefully, salvage just the silk material.
Then wrap your eggs as tight as possible without breaking the egg (right side of the material touching the surface of the eggs). Then wrap again with the pillowcase material.
Place gently in a pot, cover eggs with water and add 1/4 cup vinegar. Then turn the heat on. Once the water starts boiling, time them for 20 min. Check periodically for floaters - and push them back down again. Remove from water and let cool and dry till damp.I was impatient so I gave my eggs more airflow so they'd cool faster by placing my cooling rack over my sink and a paper towel underneath to catch drips.
Some of my favorites...
I love how the paisley ties turned out!

I got this idea from Our Best Bites. A few silk ties from the thrift store and voila!
Click here for full instructions and more pictures from Our Best Bites. Oh, and they're not edible! The dye on silk ties is not FDA approved, who knows where it's from - so don't try it! I'm going to find some cute white ceramic egg cups and display mine.
Monday, March 21, 2011
DIY: Pretend Mini Make-up for your Little Princess
Little Miss is all girl - and that is just fine with me! I wasn't a super girly-girl growing up, I didn't even start wearing make-up regularly till college, it's true. And looking back at high school photos I cringe that no one ever told me to pluck my eyebrows - seriously, my so called 'friends' of old who read this blog - why didn't you tell me!? Anyway...if Little Miss wants to be way girly, I'm not about to stop her...
She has been very insterested in my make-up for a long time, always wanting to put some on. But, I'm not about to raise one of these...
...Yikes. Little girls should not actually be wearing real make-up! They grow up fast enough as it is. But playing pretend is great!
So, when I finished off some of my make-up, instead of tossing it, this is what I did...(thanks to my sweet friend Shauna for the brilliant idea!)
Fist I cleaned the cases out completely.
Then I let Little Miss pick out two nail polish colors she wanted for her pretend make-up.
After two quick coats...
She loves putting on her pretend make-up!
It's also important to make sure your mini make-up bag is equipped with a yummy strawberry chapstick that must beeaten applied at least 25 times a day and eventually hidden by mommy for fear of chapstick intoxication.
She has been very insterested in my make-up for a long time, always wanting to put some on. But, I'm not about to raise one of these...
...Yikes. Little girls should not actually be wearing real make-up! They grow up fast enough as it is. But playing pretend is great!
So, when I finished off some of my make-up, instead of tossing it, this is what I did...(thanks to my sweet friend Shauna for the brilliant idea!)
Fist I cleaned the cases out completely.
Then I let Little Miss pick out two nail polish colors she wanted for her pretend make-up.
After two quick coats...
She loves putting on her pretend make-up!
It's also important to make sure your mini make-up bag is equipped with a yummy strawberry chapstick that must be
Thursday, February 17, 2011
Deceptively Delicious...mwa-ha-ha
The other day we had chicken patty sandwiches on buns & cauliflower for dinner. Little Miss dissected her sandwich (her thing as of late) and only ate the chicken.
She then declared she was done and I was not about to pick a fight - especially since daddy was out of town and not here to back me up.
So I suggested we have shakes for dessert. I then took her plate and when she wasn't looking added the bun and cauliflower to her fruit/yogurt shake. I tasted it and it was delicious! And yes, she drank the whole thing. Sucker!
Really - love this book! Love the simple idea it takes and once you understand a little bit about how to hide things in food - you can do it to your everyday recipes! Or when you're in a pinch with your 2 year old and decide to make *shakes* instead of fight.
It is also very much related to how you can make your own baby food - which I cannot wait to do again! I love my food processor! Oh, and I love my knock-off magic bullet blender my honey got me for Christmas. Here are a couple of the recipes from the book I've tried and posted about...
Easy Lasagna
Thursday, January 27, 2011
Homemade Steamers
If you haven't had a steamer - you need to! I love them with all of my little girl heart. It's a great alternative to hot chocolate for a warm drink during the cold months (or all year round if you're like me). You can get them at coffee shops for about $3-4, so yummy. But kind of on the pricey side for me.
And if you don't drink caffeinated drinks, no worries - steamers are only milk with flavoring - no caffeine.
I decided I didn't want to pay the high price anymore - my homemade price for steamers is 43 cents/cup compared to the $3-4 I usually pay. Yep, good savings! And look at that frothy goodness...the only thing missing is the beatnik ambiance of the coffee shop....
Here's what you'll need...
Torani syrup flavoring. You can find it by the coffee filters and creamers in your local grocery store. There are tons of flavors - my favorites are Irish Cream, Hazlenut, and Amaretto. You can also use Torani syrups to flavor hot chocolate, milk shakes, lots of things! I even used 1/2 tsp in my bowl of cream of wheat the other morning - delicious!
Heat up on med-low 1 cup milk. To make sure it doesn't scald, and that it is nice and frothy at the end I use my handy mixer, love this thing...
...The milk will be far to hot to drink if you let it simmer - so just keep an eye on it and when you see the first light steam come off of the milk, turn it off. Then add 2 Tbsp your choice Torani syrup - mix again. And voila - homemade steamers! Tastes just like what you buy at the coffee shop!
Tuesday, January 25, 2011
Favorite Valentine's Wreath Ever!
I love this wreath! If I wasn't about to go into labor and if we weren't about to move - I would make this in a heart beat! It is so cute! Maybe next year.
You can find the tutorial here.
Tuesday, January 18, 2011
Homemade Liquid Laundry Soap

So, I technically cannot give out my recipe...but I can point ya'll in the right direction to making your own and let you know about all the amazing benefits!
Let's start with the quick facts...
- Making your own soap saves you ridiculous amounts of money!! Tide is about 18 cents/load & the generic at the store is about 13 cents/load - my homemade soap cost is about 2 cents/load!! TWO CENTS!! Love it!
- It's all-natural, biodegradable, and phosphate free! No fillers - just cleaning power.
- It's scent free for those with super allergies
- Extra sensitive for those with skin problems (exzema, etc)
Interested in making your own? You'll need a 5 gallon bucket, cheese grater, and spoon to stir.
Here is a link to some recipes I found online...have fun saving money and being eco-friendly!!
I've also made powdered detergent and loved it!
Tuesday, December 7, 2010
DIY: Homemade Cloth Diapers
{guest post by my amazing niece, and new mommy - Dianna, tips on how to make your own cloth diapers}
____________________________________________________________
As much as I love the ease and convenience of a disposable diaper, I don’t so much love the price of them. I decided I’d probably do some cloth diapering to offset the price of disposables, but even prefolds are expensive. Fortunately, you can make your own!I picked up some fleece fabric from a secondhand store for about $2. I also picked up a towel from the store for about $2 as well.
First thing you need to do is measure out the liners. I used the towel for my liners since I figured they’d be most absorbent. For my project, I used a 5 inch by 14 inch piece, but you can experiment with sizes. If you are using towel for the lining, it’s a good idea to use a serger along the edges. If you don’t have a serger (I don’t), use a zig zag stitch. If your liner is made of non-fraying fabric, you can probably skip this step.
Then you need the fleece cut out for the cover on the liners. These pieces are 23 inches by 15 inches.
Next up, fold the cover over so that the 15 inch edges are together (or “hamburger style” if that helps) and place the liner with a 14 inch edge against the cover’s 15 inch edges.
Sew these edges together. You should be able to do this with the diaper after you’re done.
Next, shift the liner so that it is in the middle of the cover. It will look like 3 sections: cover, liner, and cover.
Sew up the top and bottom of the diaper, making sure to leave a hole to turn it right side out. The liner doesn’t have to be sewn down into the top and bottom seams, but it can be if you like.
Now turn the diaper inside out. You’re going to sew two lines down each side of the liner. The best place to start is by following the seam from the first time you sewed the liner down. The second line can be done by eyeballing the first line, or measuring it out if you’re a perfectionist.
Remember to sew up the hole, and ta-da! You’ve made a diaper!
The best part about making your own diapers is using whatever fabric you have around the house. You can be creative and experiment with different liners for the most absorbency – t-shirts, sheets and blankets, old towels, I’ve even seen some people use old jeans for liners.
_______________________________________________________________
Thanks Dianna for that great step-by-step! And just because I love you and my new little great nephew - I have to show off a picture of him...
I really want to try cloth diapering, but am also kind of a sissy about having to clean them. However - I do think cloth diapers would be a great addition to emergency supplies for those of us who aren't brave enough!
Have any of you amazing readers done cloth diapering? Have any tips to share on how best to use/clean them?
Labels:
baby,
diy,
emergency prepardeness,
guest blogger,
infant,
newborns,
projects,
saving money
Friday, December 3, 2010
DIY: Pine Cone Wreath Updated
Remeber this harvest beauty?
Now it's covered with festive cheer...
I have had a few pine cones randomly fall off - but mostly that was because I ran into the wreath with my shoulder while trying to get through the door with a little girl in toe...nothing a little hot glue gun couldn't fix! Still love that it was almost free.
The Christmas candy cane ribbon I already had too - I just had to buy the thin red ribbon, minimal expense. Loving the change!
For the full tutorial click here.
** DON'T FORGET TO ENTER IN OUR GIVEAWAY - click here to learn more.**
Labels:
around the house,
diy,
holidays,
just for fun,
projects,
saving money
Subscribe to:
Posts (Atom)